Google Ads Conversion Tracking with Google Tag Manager
Tracking Google Ads conversions with Google Tag Manager gives you insights into the actions visitors take after viewing an ad on your site.
When visitors click your Google Ad, a temporary cookie is stored on their devices. Then, when they complete an action you’re tracking, a new conversion is counted.
Follow the steps below to set up Google Ads Conversion tracking in your tawk.to widget and learn which ads, ad groups, and keywords are bringing the conversions and conversations to your business.
- Set up a conversion
- Set up a Google Adwords Conversion Tracking in GTM
- Set up a tag for using the JS API and the Custom Event trigger
- Check to see if the Google Ads Conversion Tracking tag has been triggered
Prerequisites
You will need to set up a tag for the tawk.to widget in Google Tag Manager. If you have not yet done this, follow the steps in this article: How to add the tawk.to widget with Google Tag Manager
Set up a Conversion
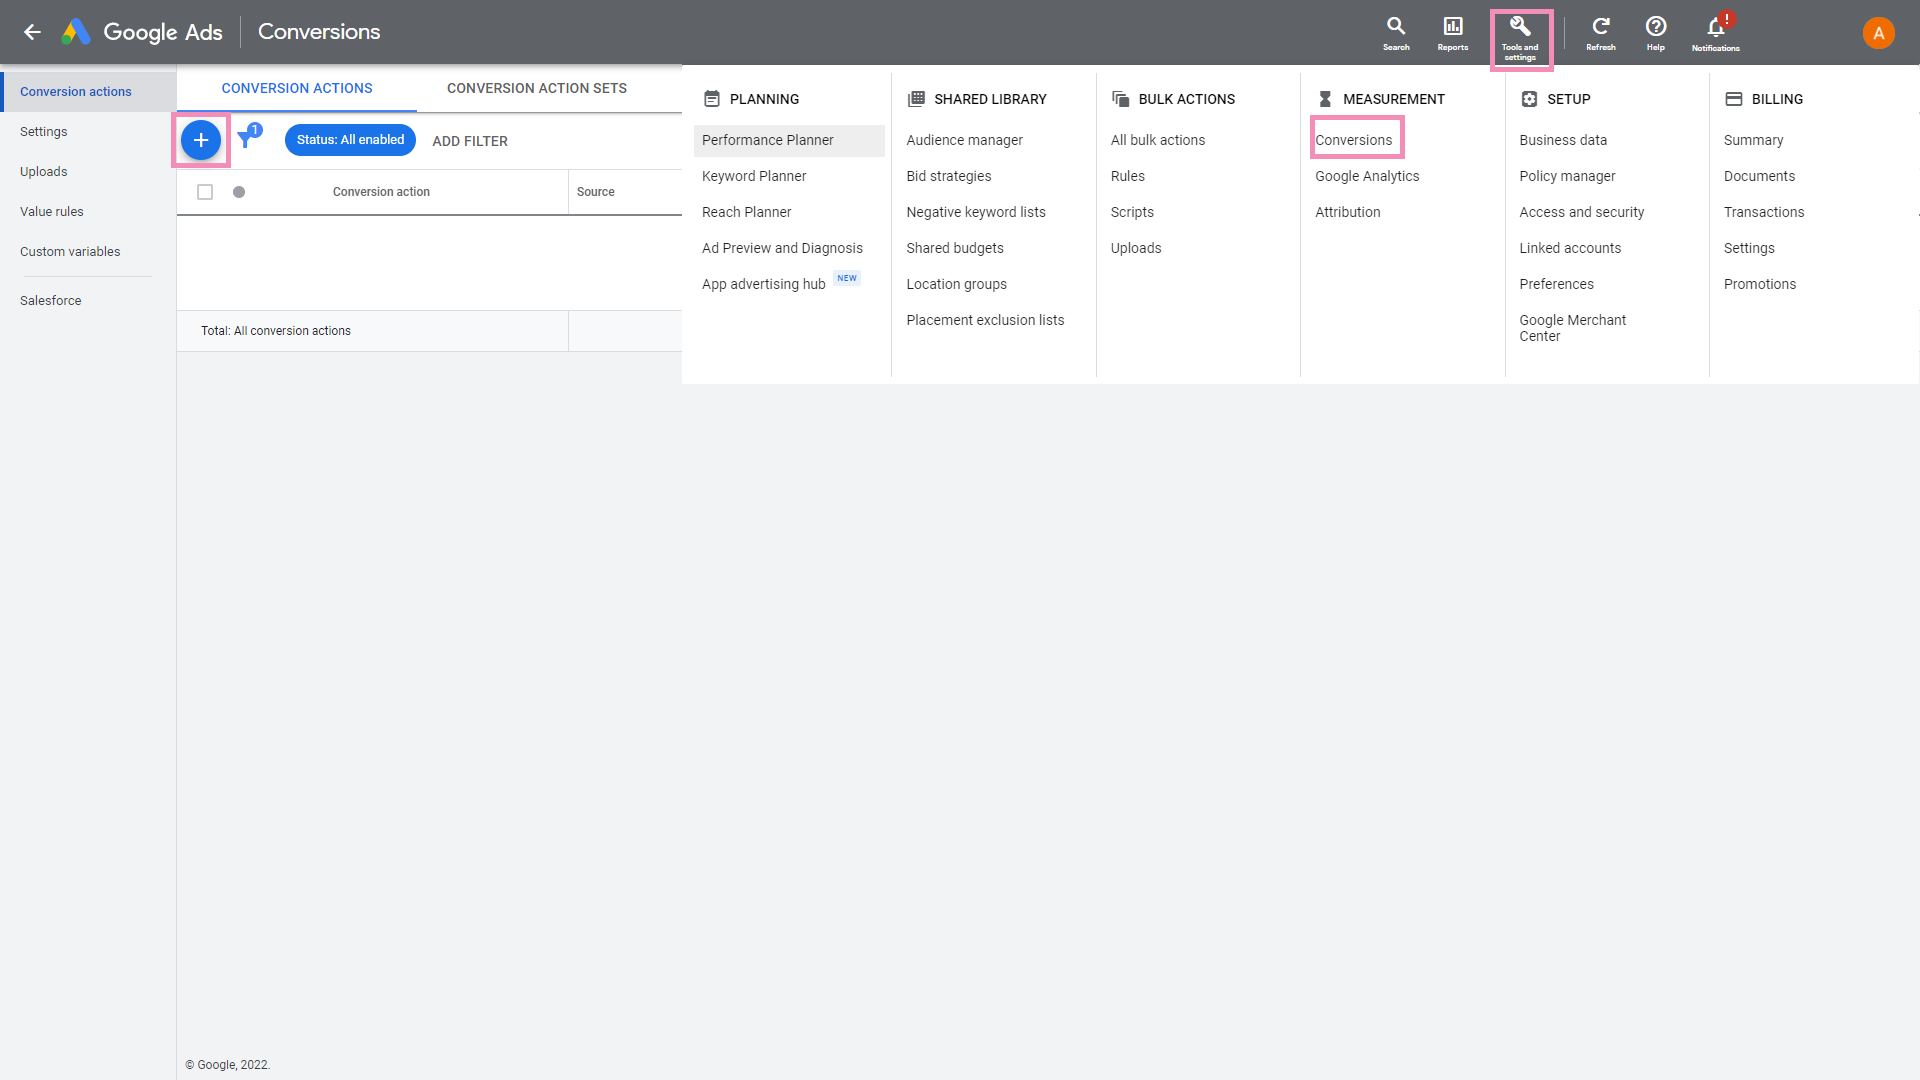
- Log in to your Google Ads account and head over to Tools and settings ➞ Measurement ➞ Conversions. Then, click the + button to add a new conversion.

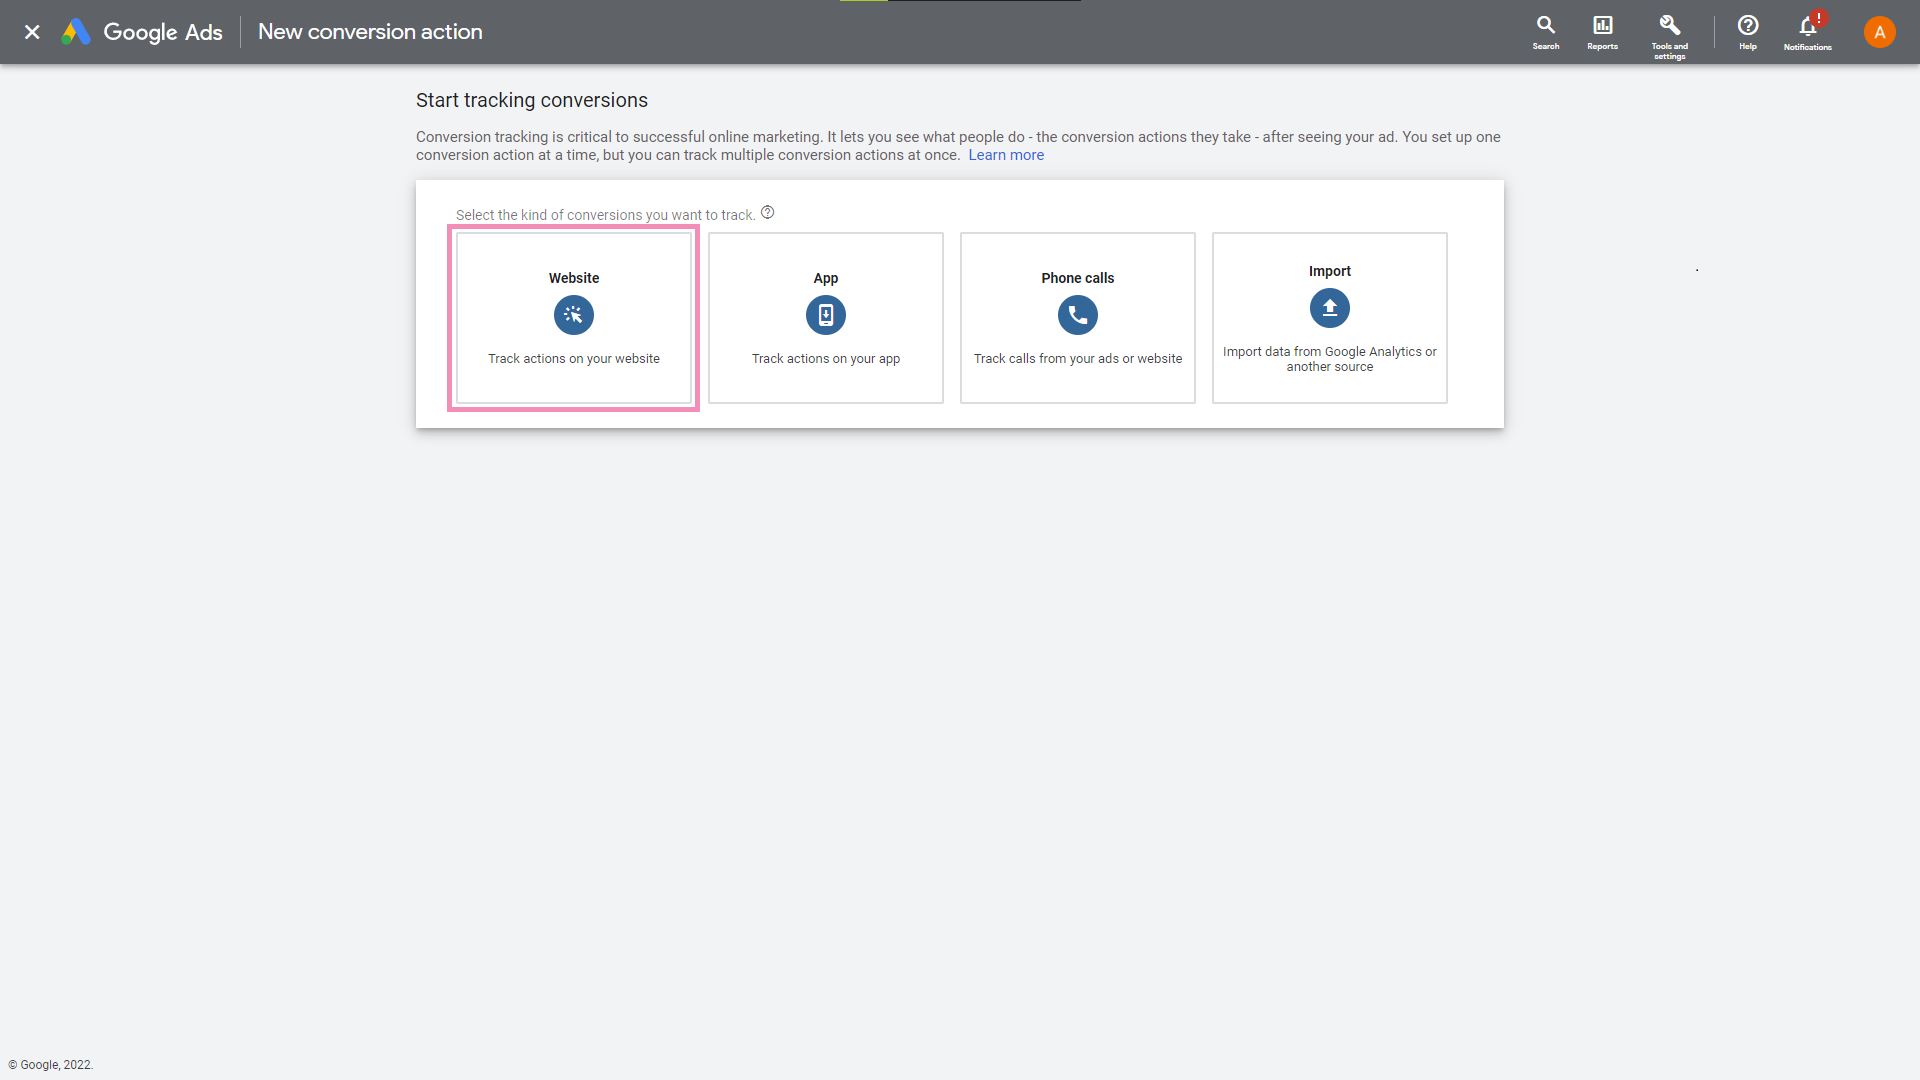
- Select Website as the type of conversion you would like to track.
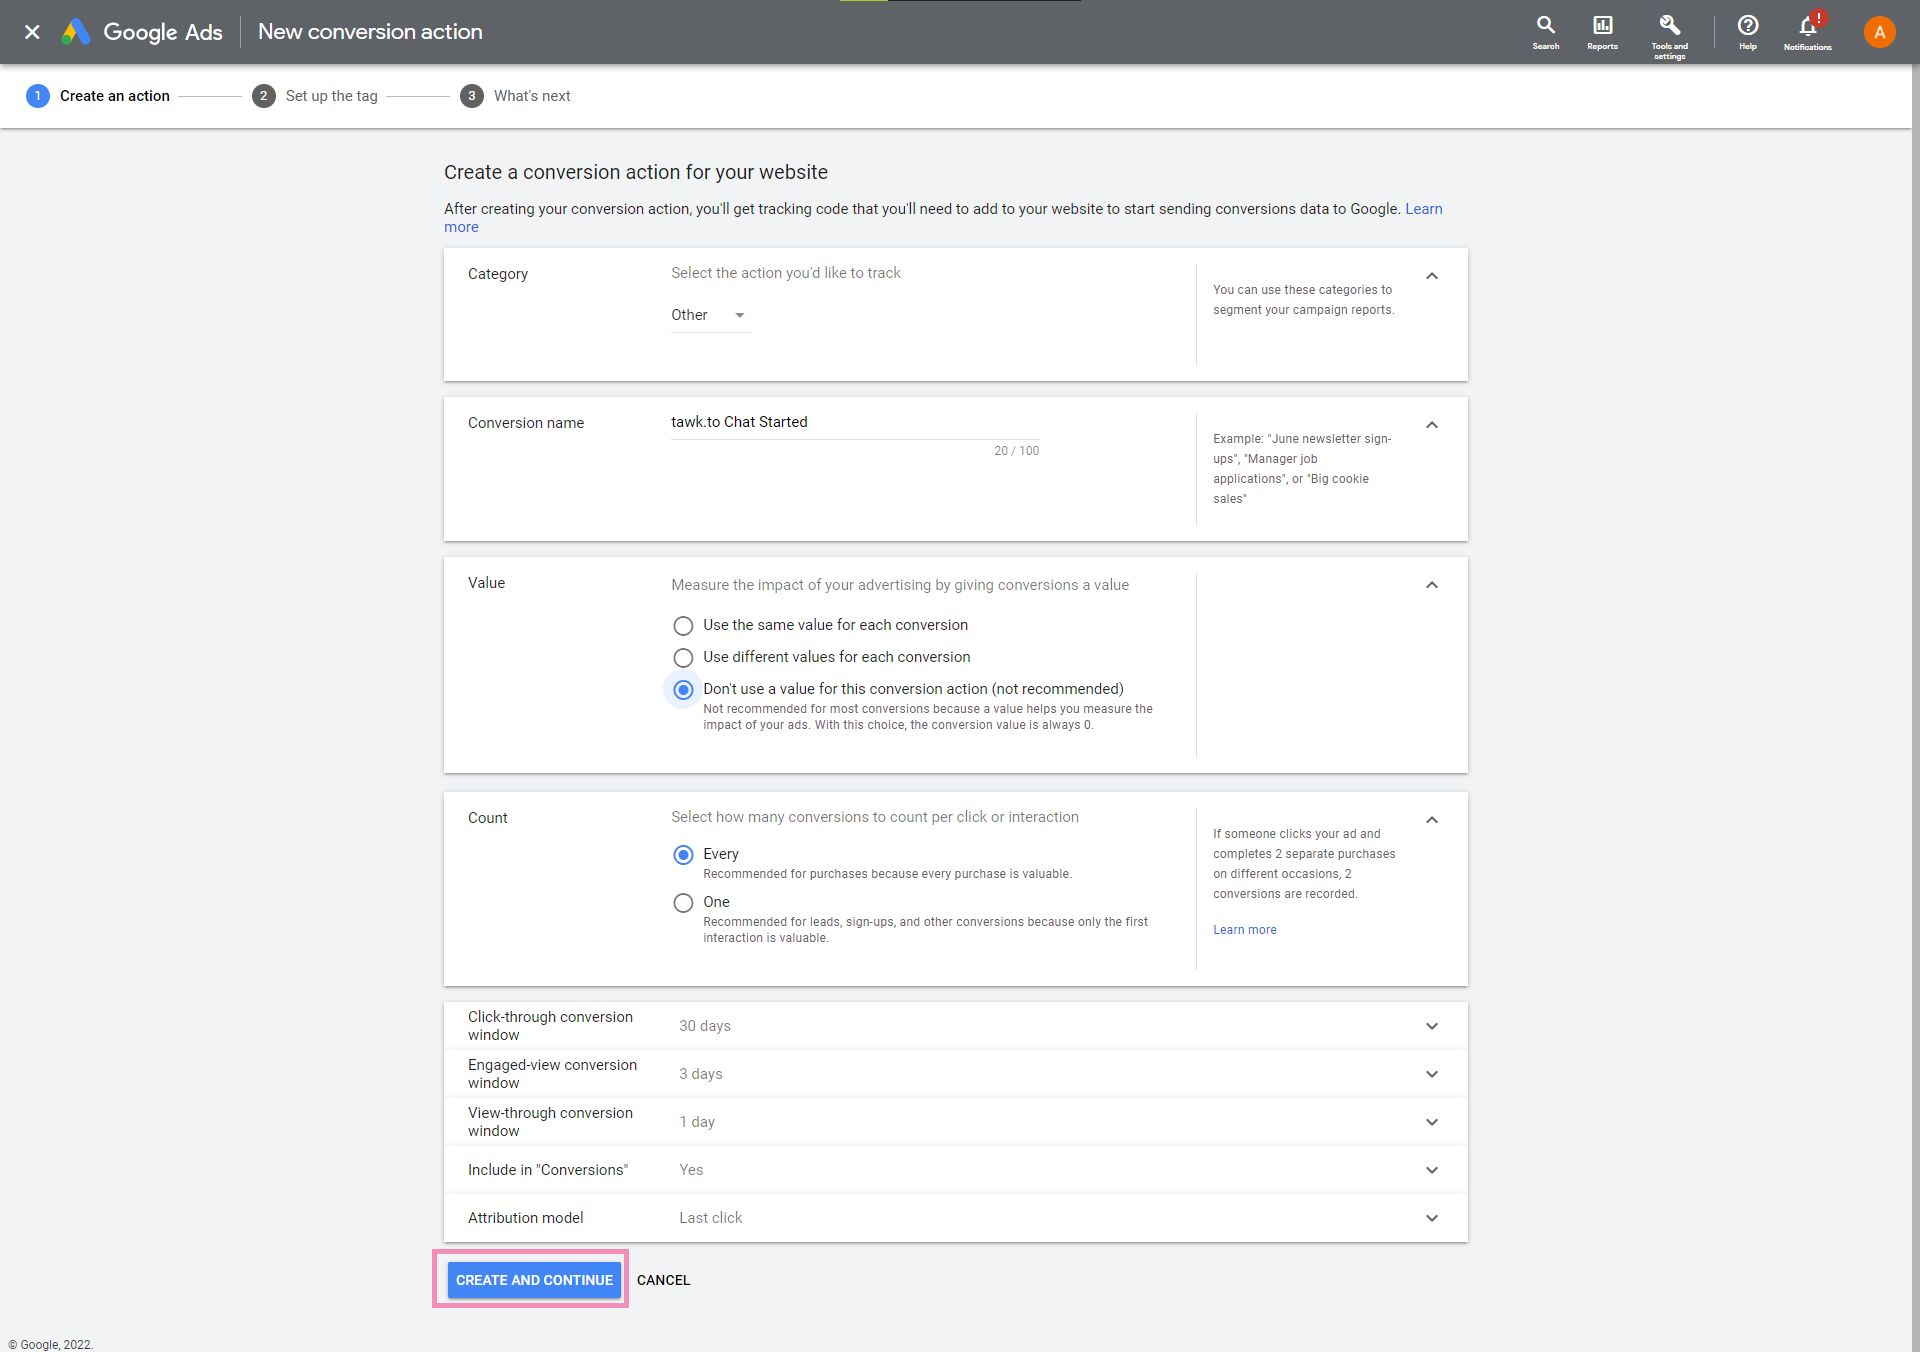
- Next, it’s time to configure your conversion. Select a category, name your conversion, and input a value representing the impact of the conversion on your business. Then, click Create and Continue.
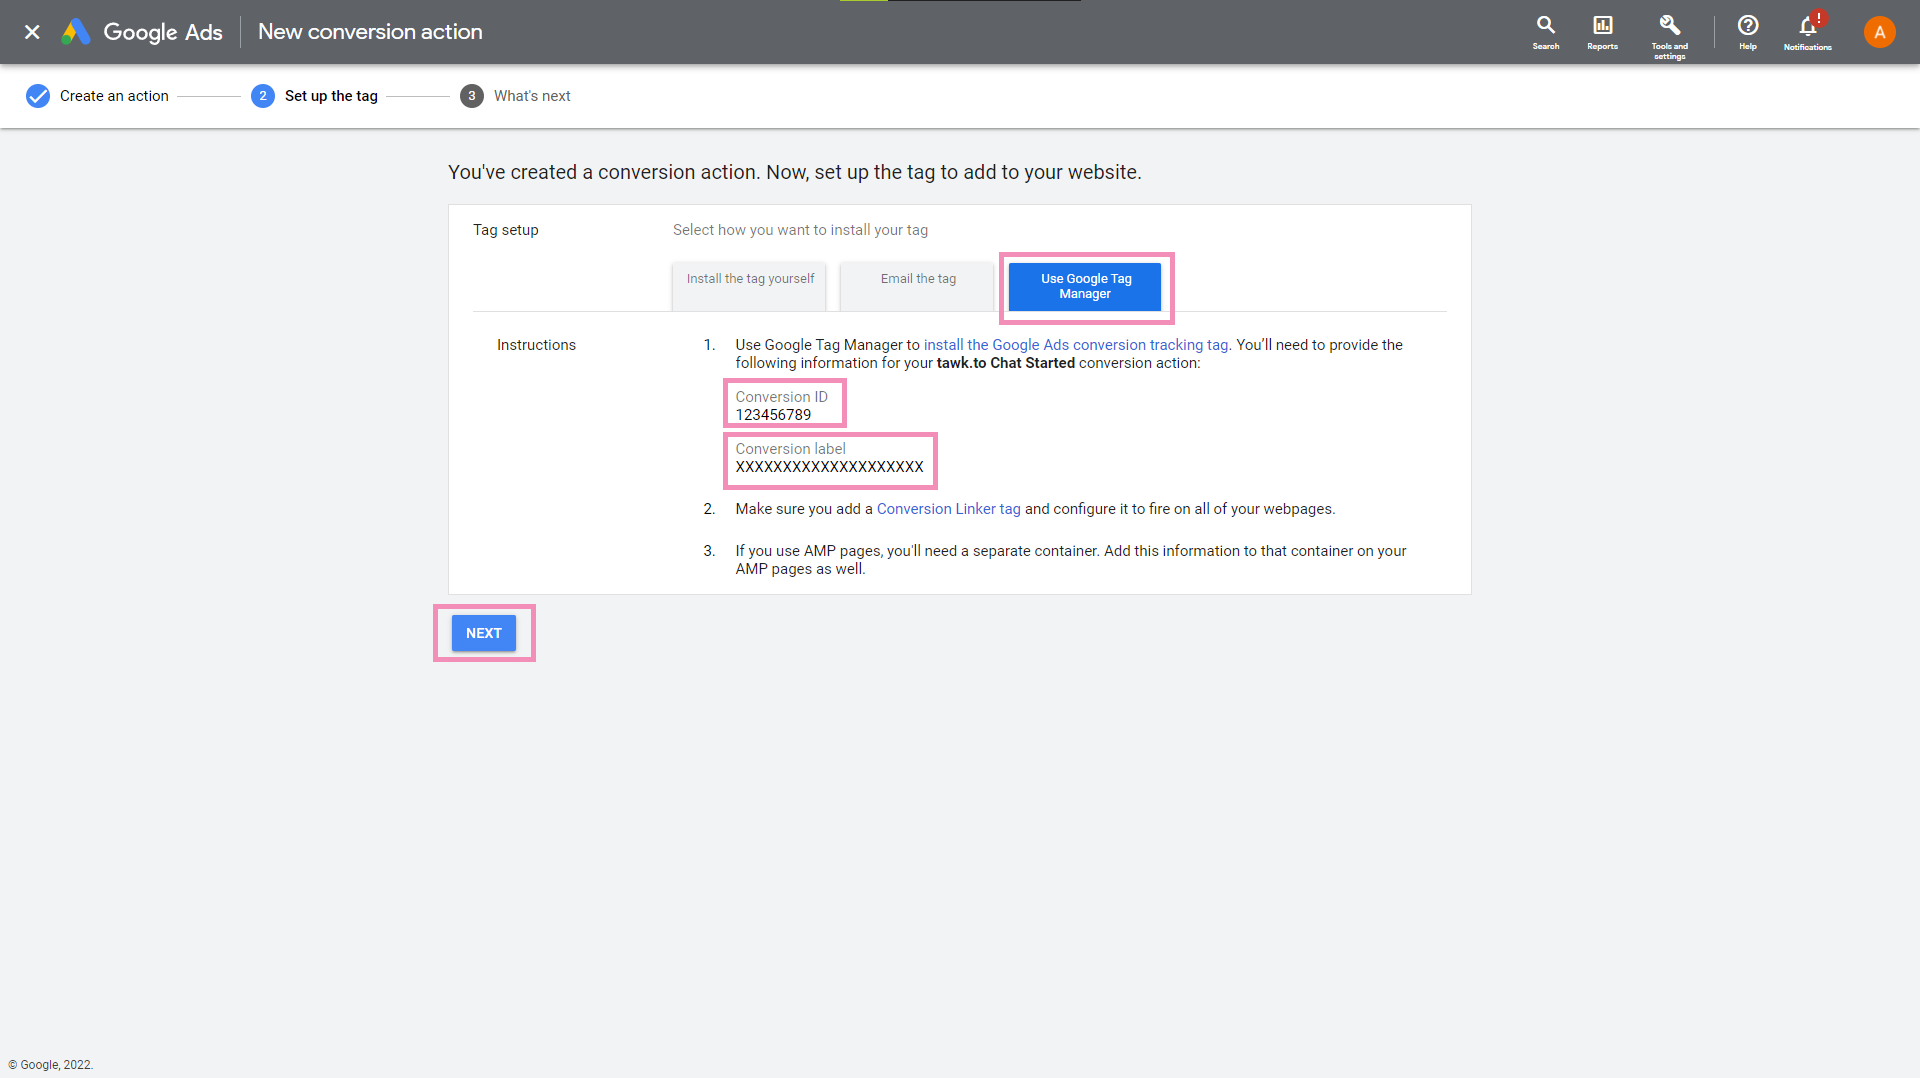
- After creating the conversion, you’ll be presented with options for setting up the conversion tag.
Select Use Google Tag Manager and take note of the Conversion ID and Conversion Label. We’ll be using these later on.
Click Next to finish the creation process.
Set up Google Adwords Conversion Tracking in GTM
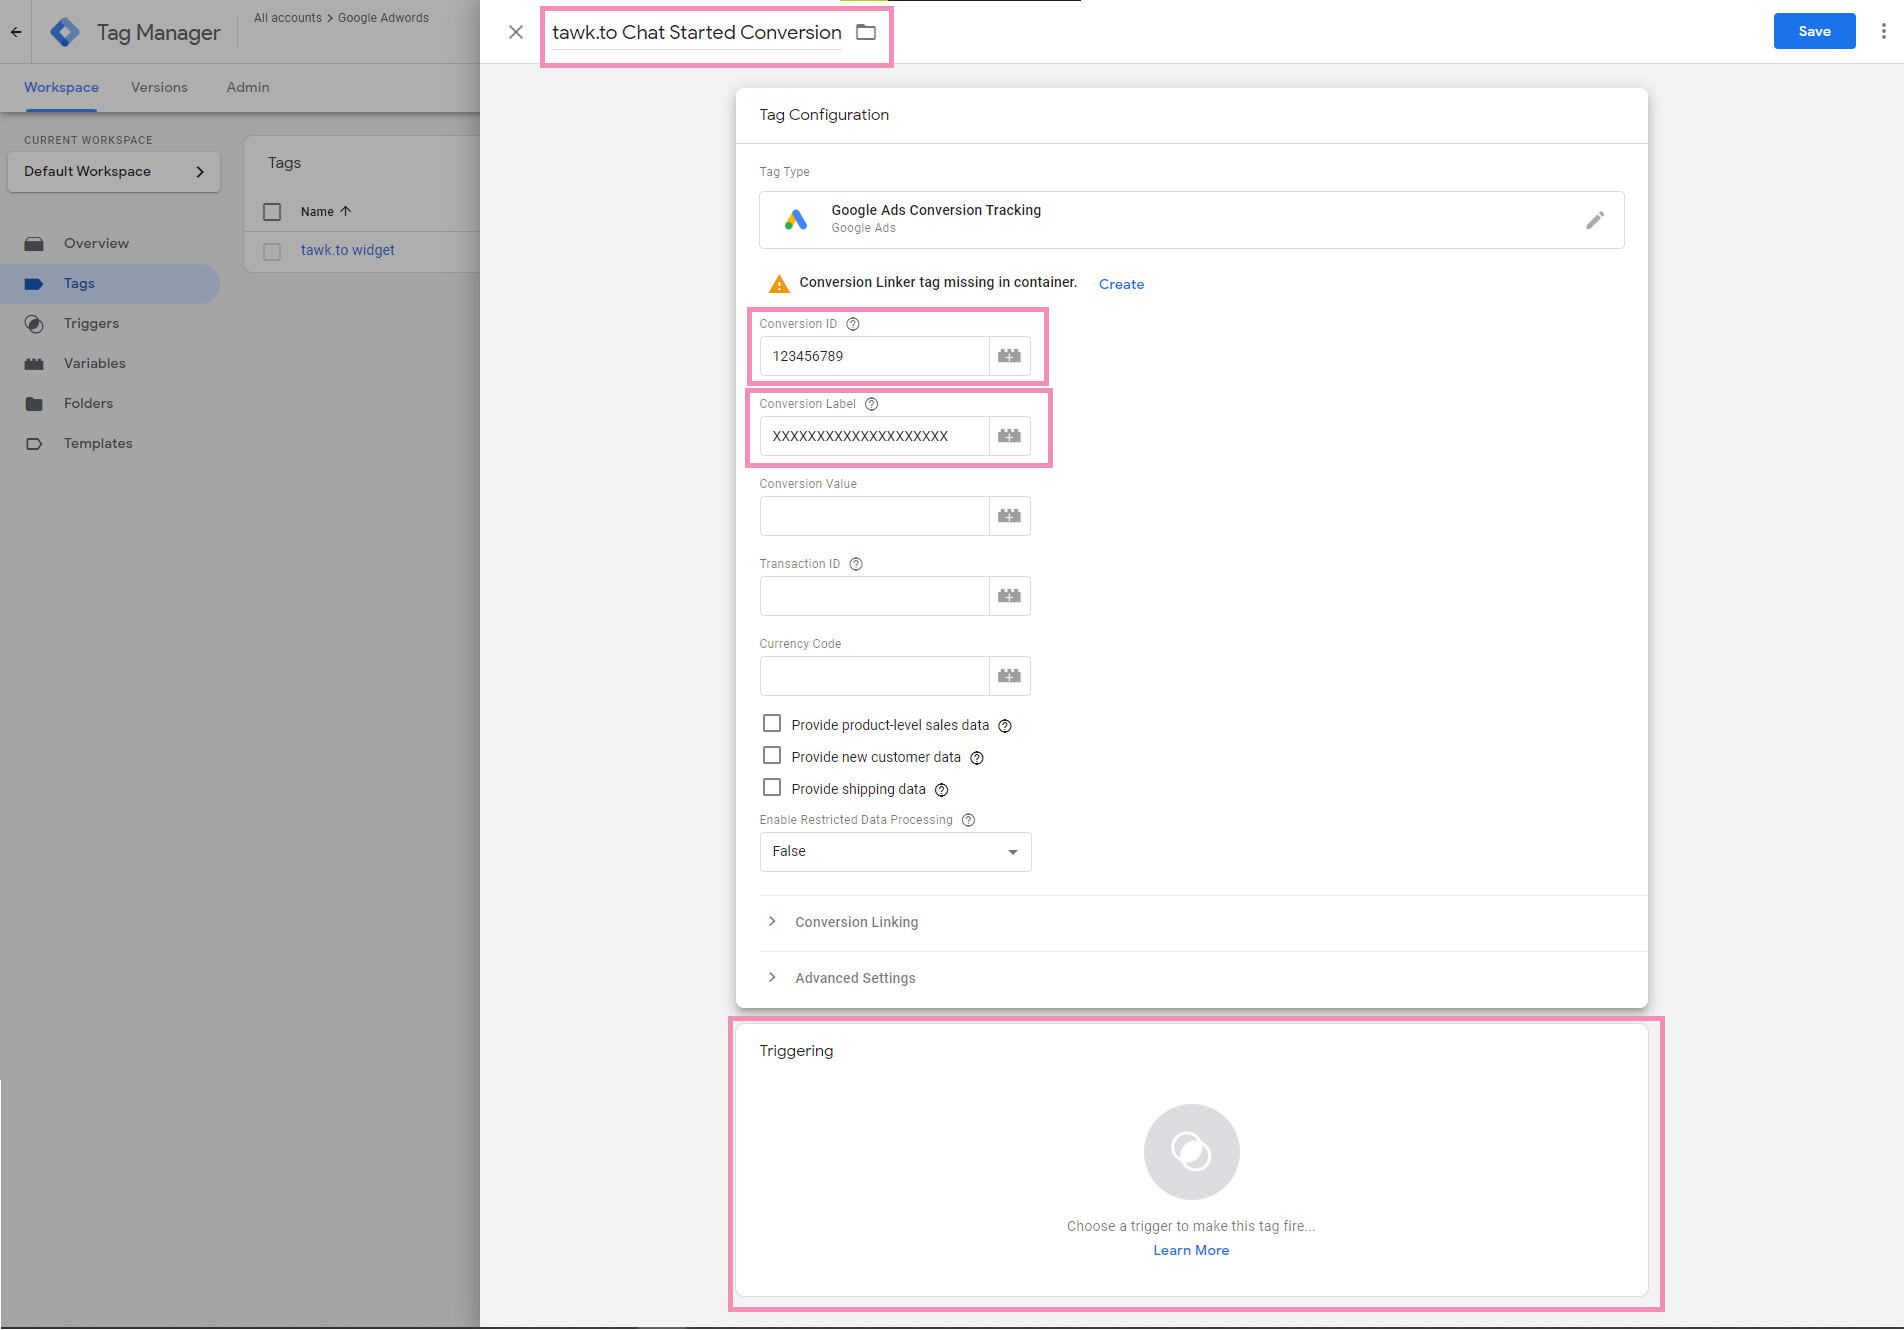
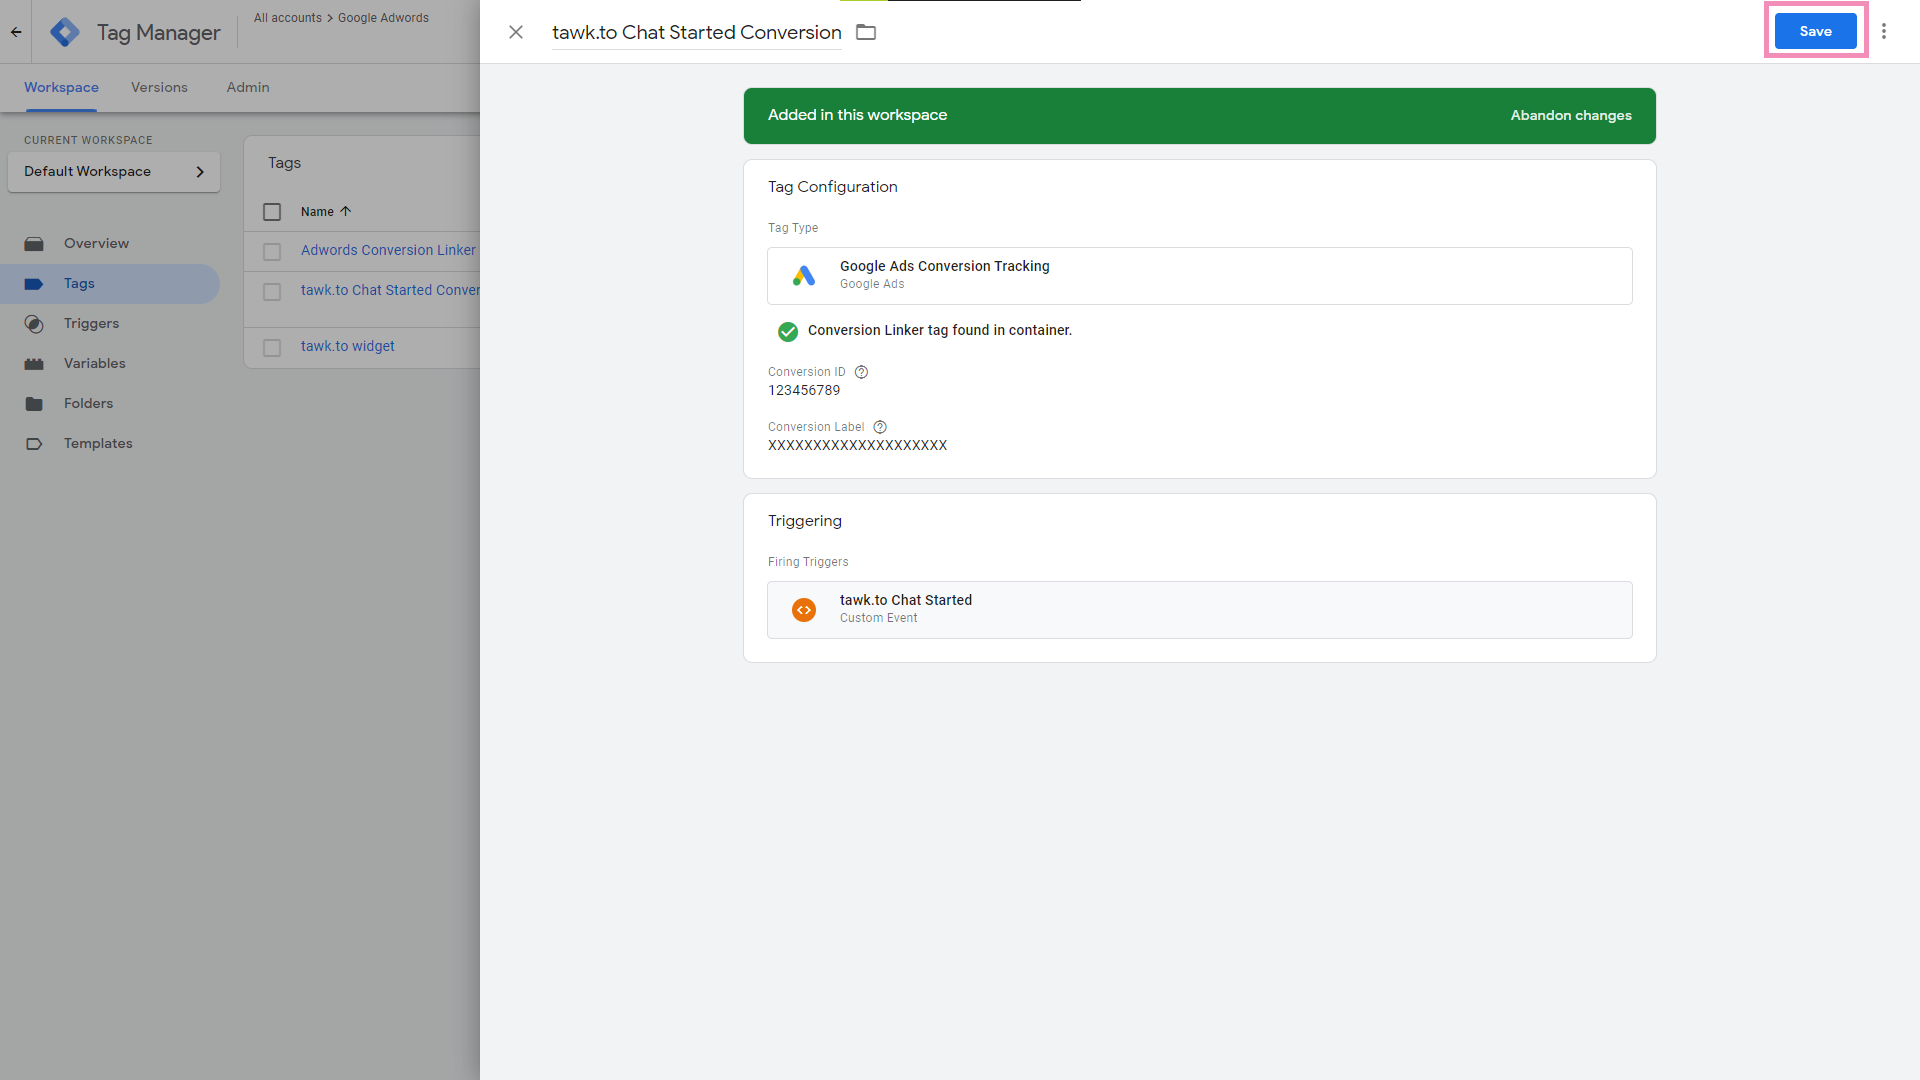
- Create a new tag for adding Google Ads Conversion Tracking. Make sure to rename the tag. Enter your Google Ads Conversion ID and Conversion Label into their respective fields. Then, click Triggering to select a trigger.
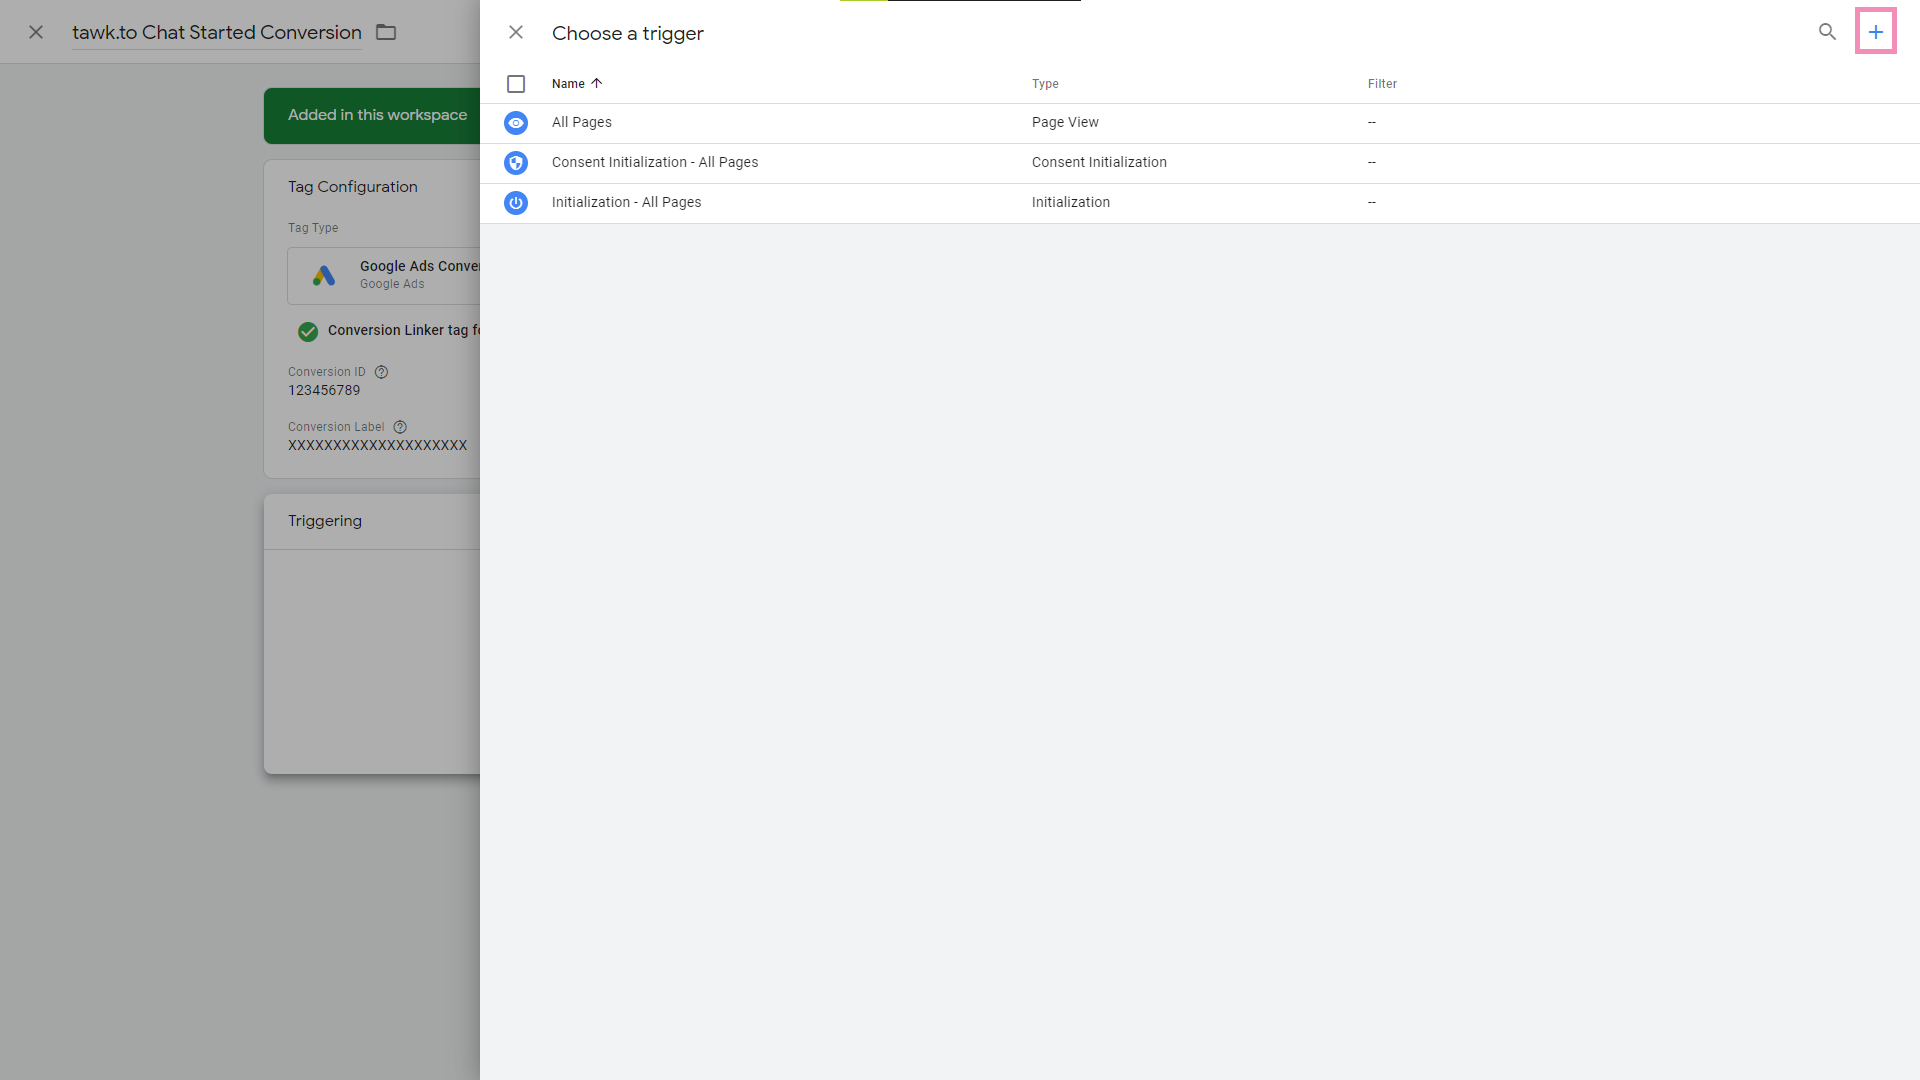
- Click the + sign located in the upper-right corner of the panel to create a new trigger.
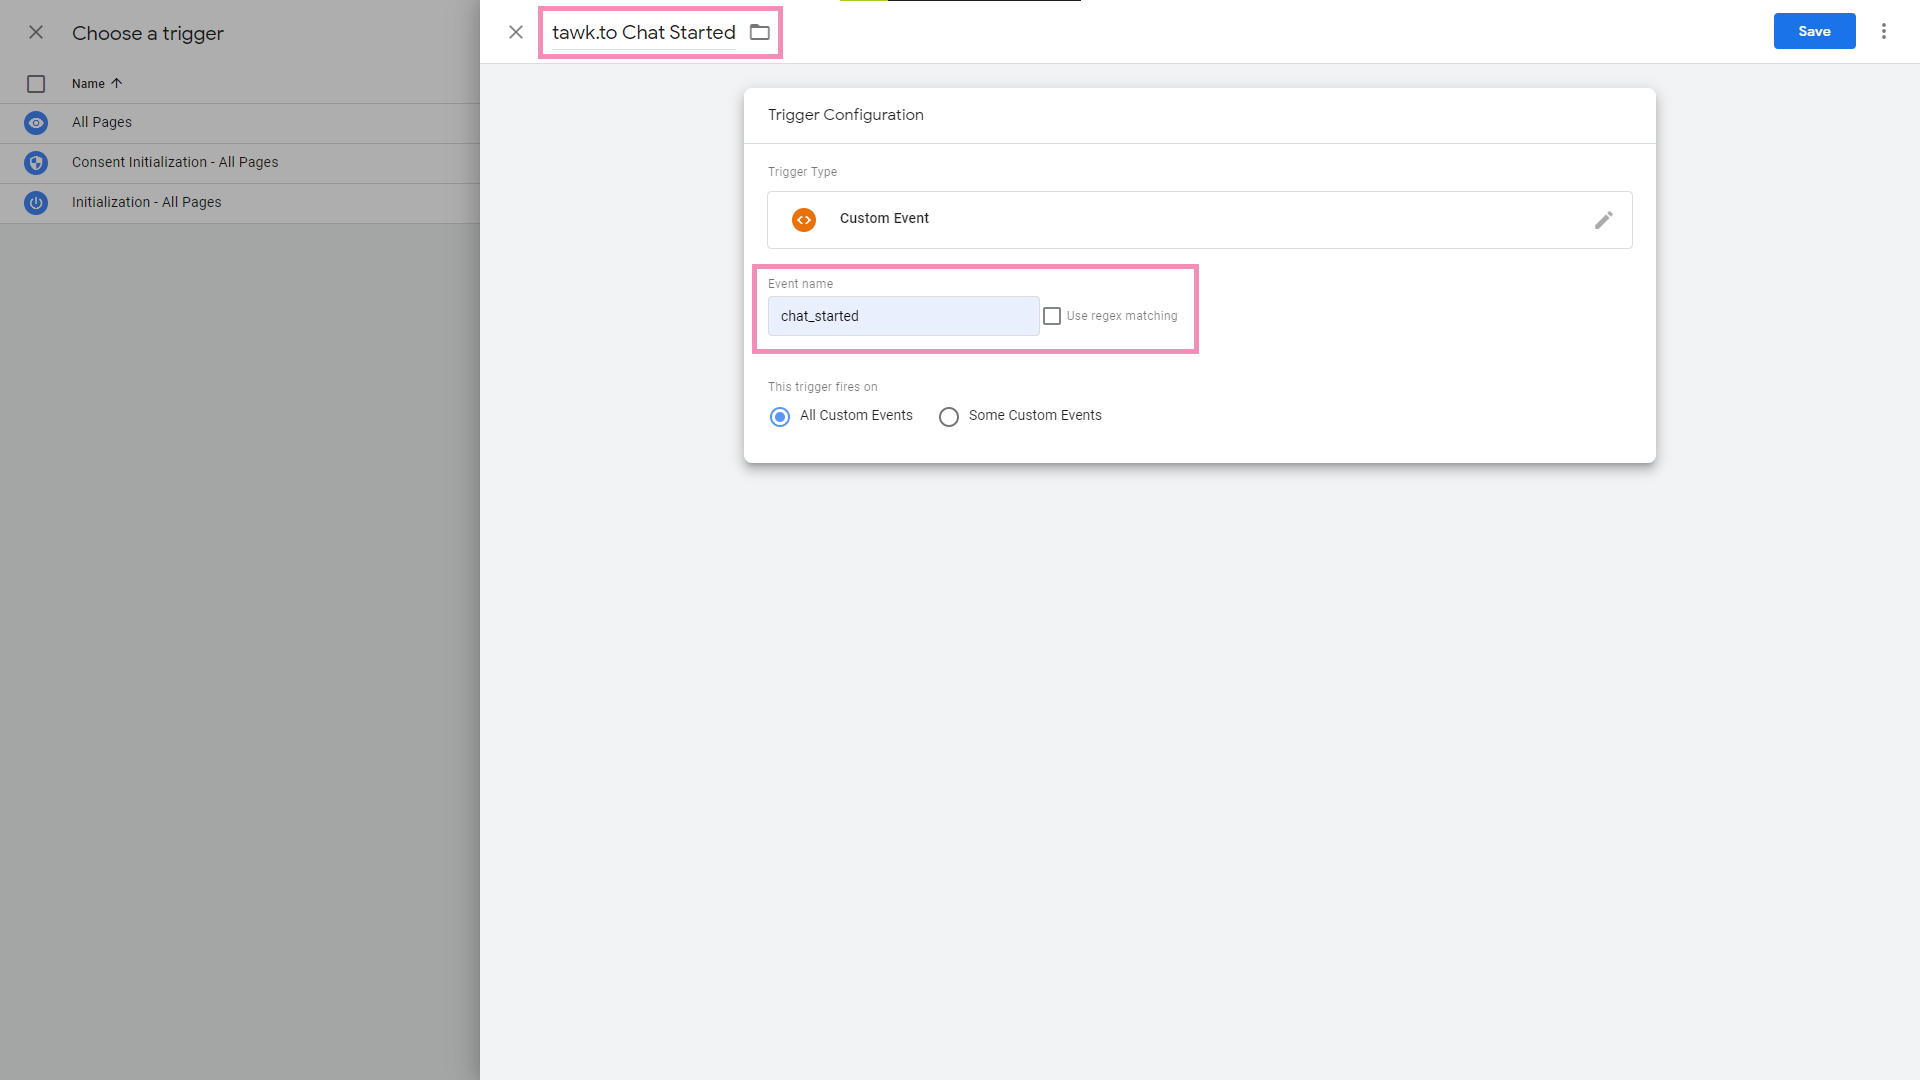
- Click the Trigger Configuration pane and select Custom Event as the trigger type. Rename the custom event. Then, in the form, add an Event Name for the conversion tracking and click Save to create the trigger.
- Next, click the create link beside the Conversion Linker tag missing in container notification. This will open a panel to create the Conversion Linker tag. Rename the tag and click Save.
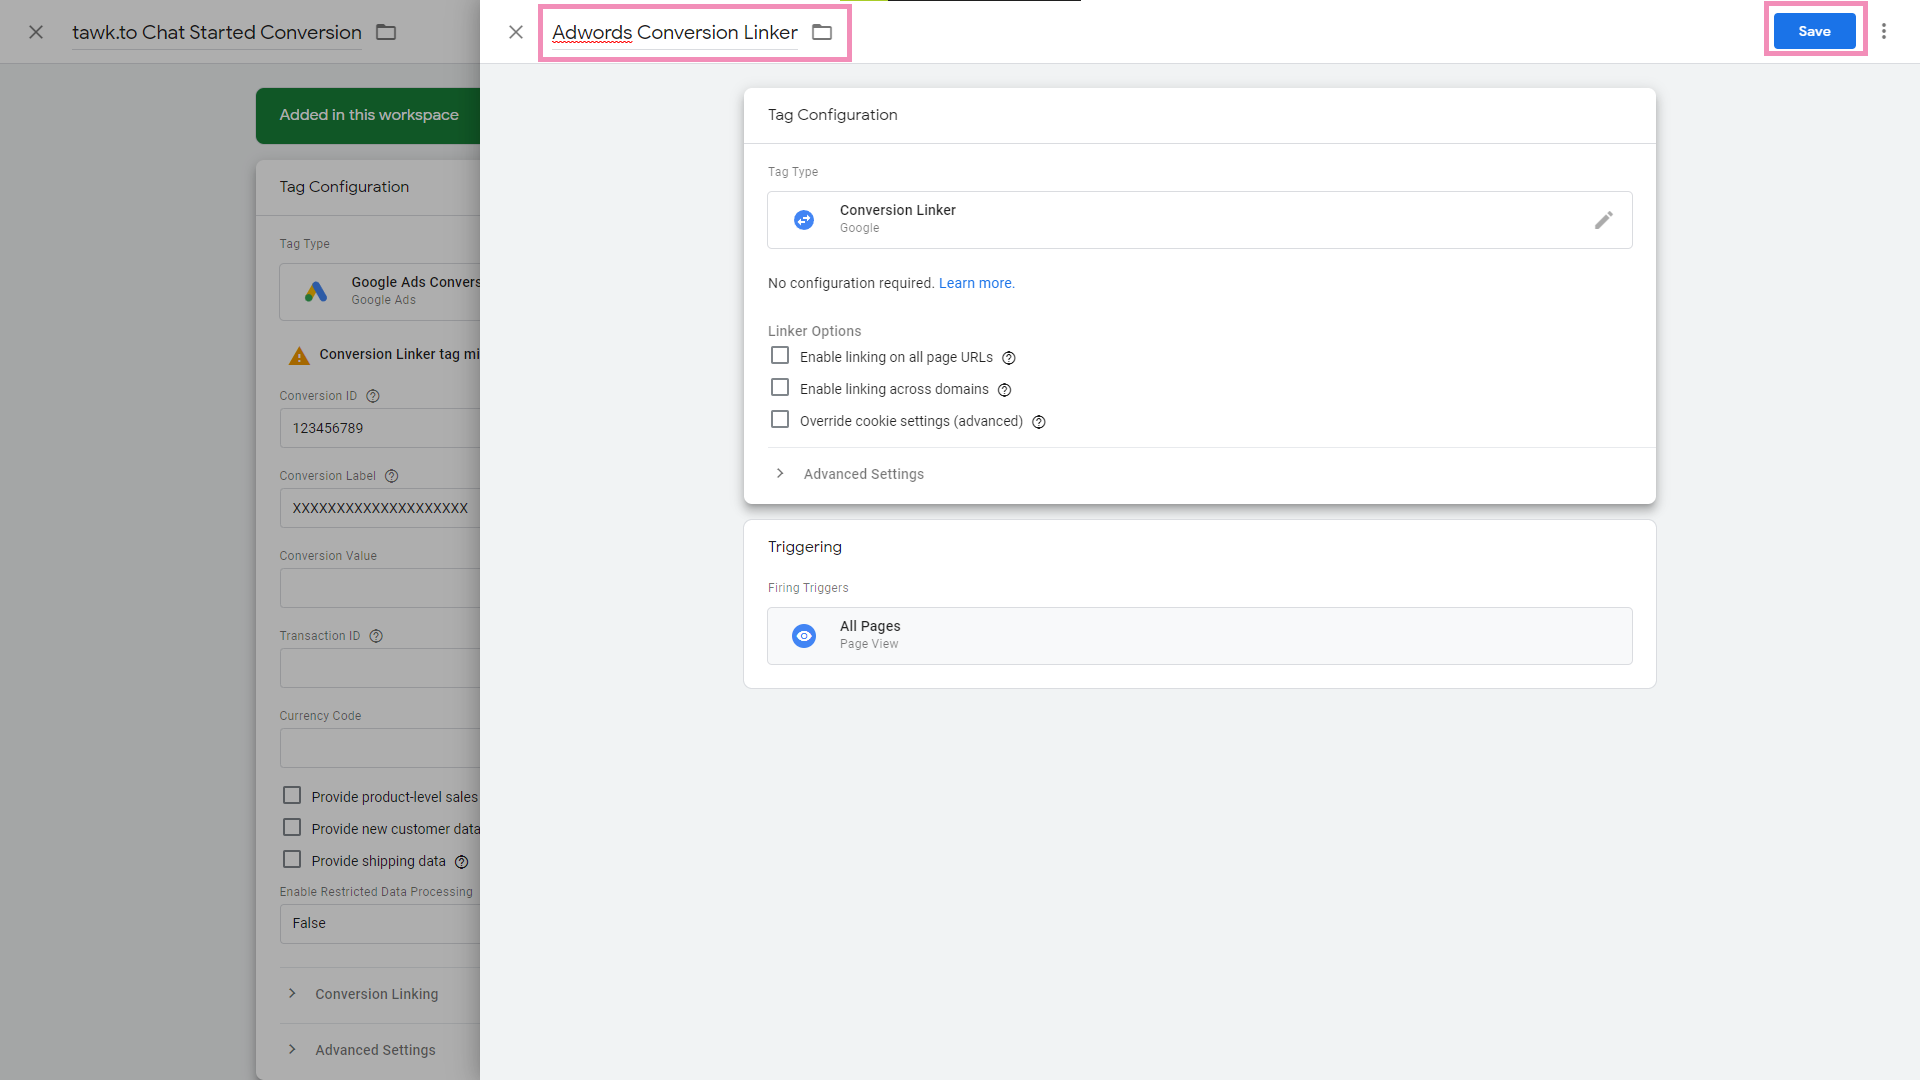
- Lastly, you’ll be redirected back to the Google Ads Conversion Linker tag configuration panel. Click Save to finalize the creation of the tag.
Set up a tag for using the JS API and the Custom Event trigger
In this section, we’ll walk through a sample setup triggering the chat_started custom event we created earlier using the JS API onChatStarted function.
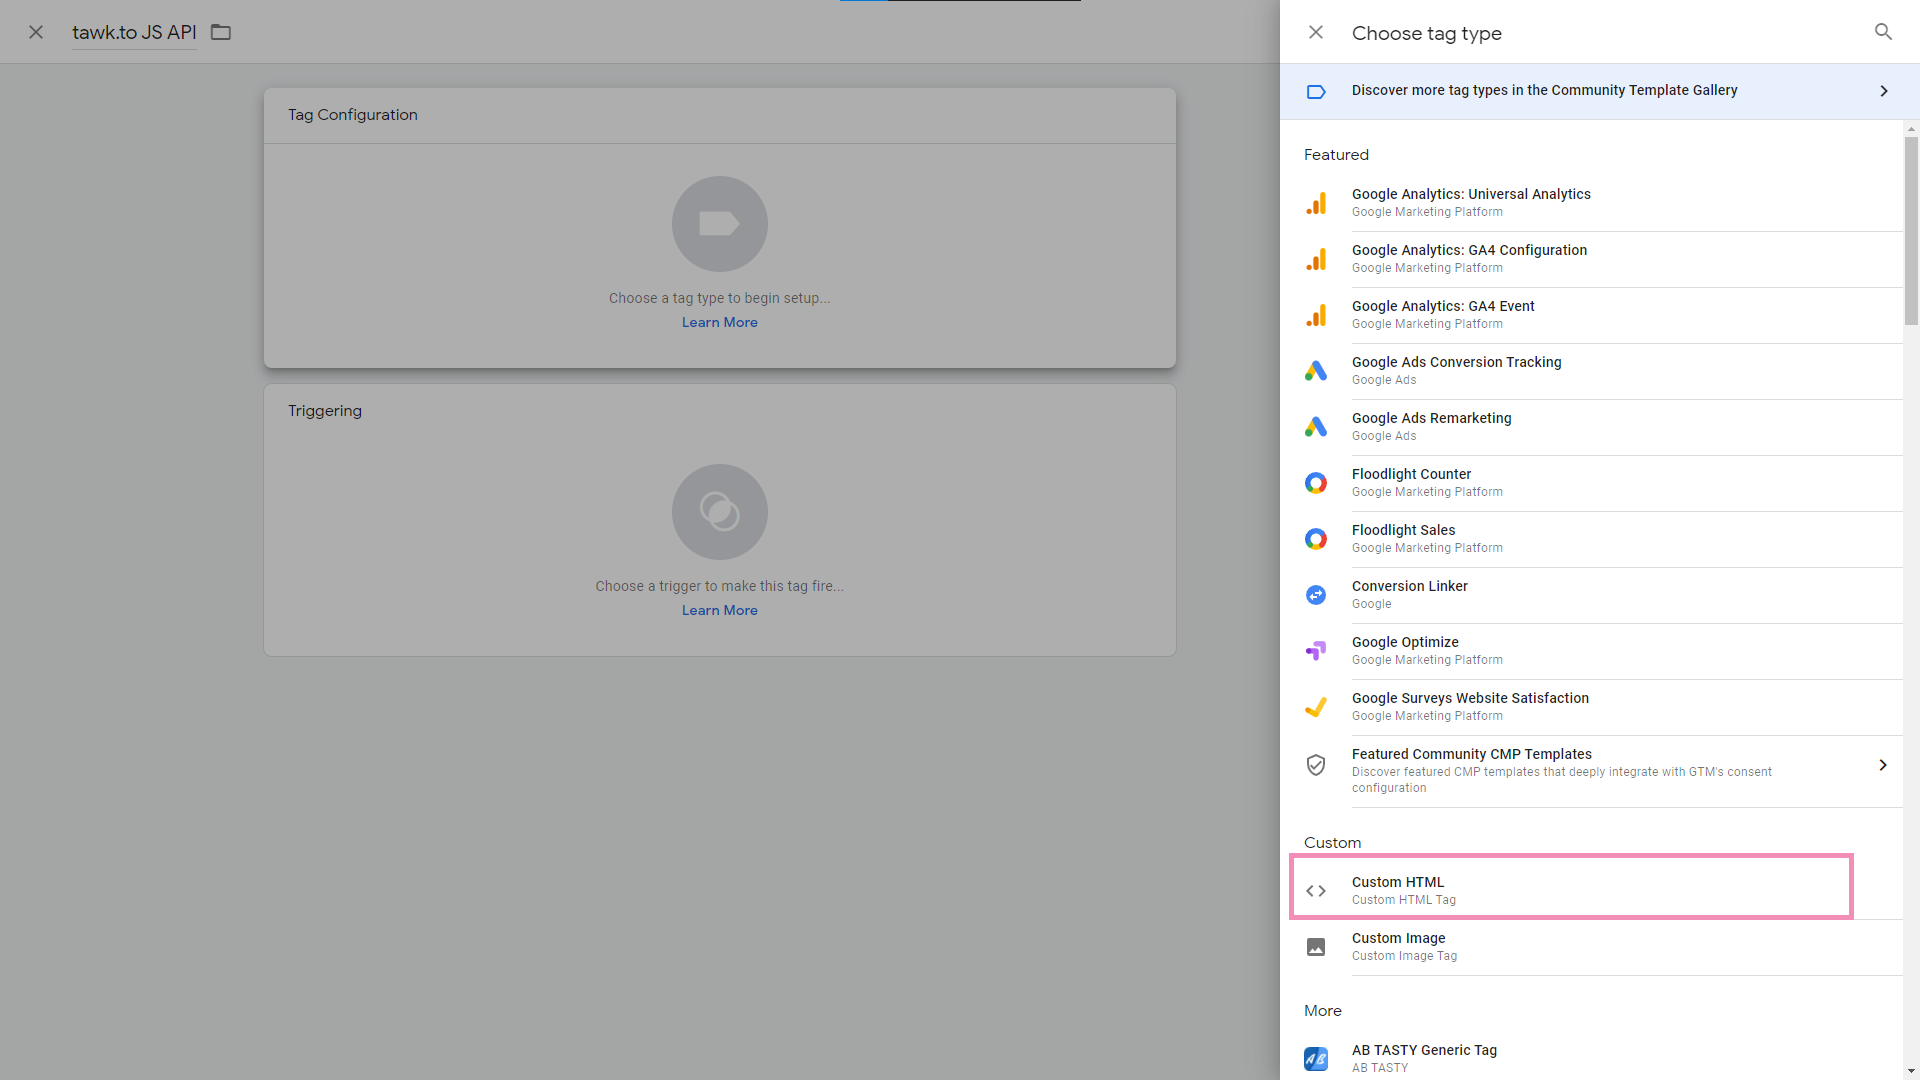
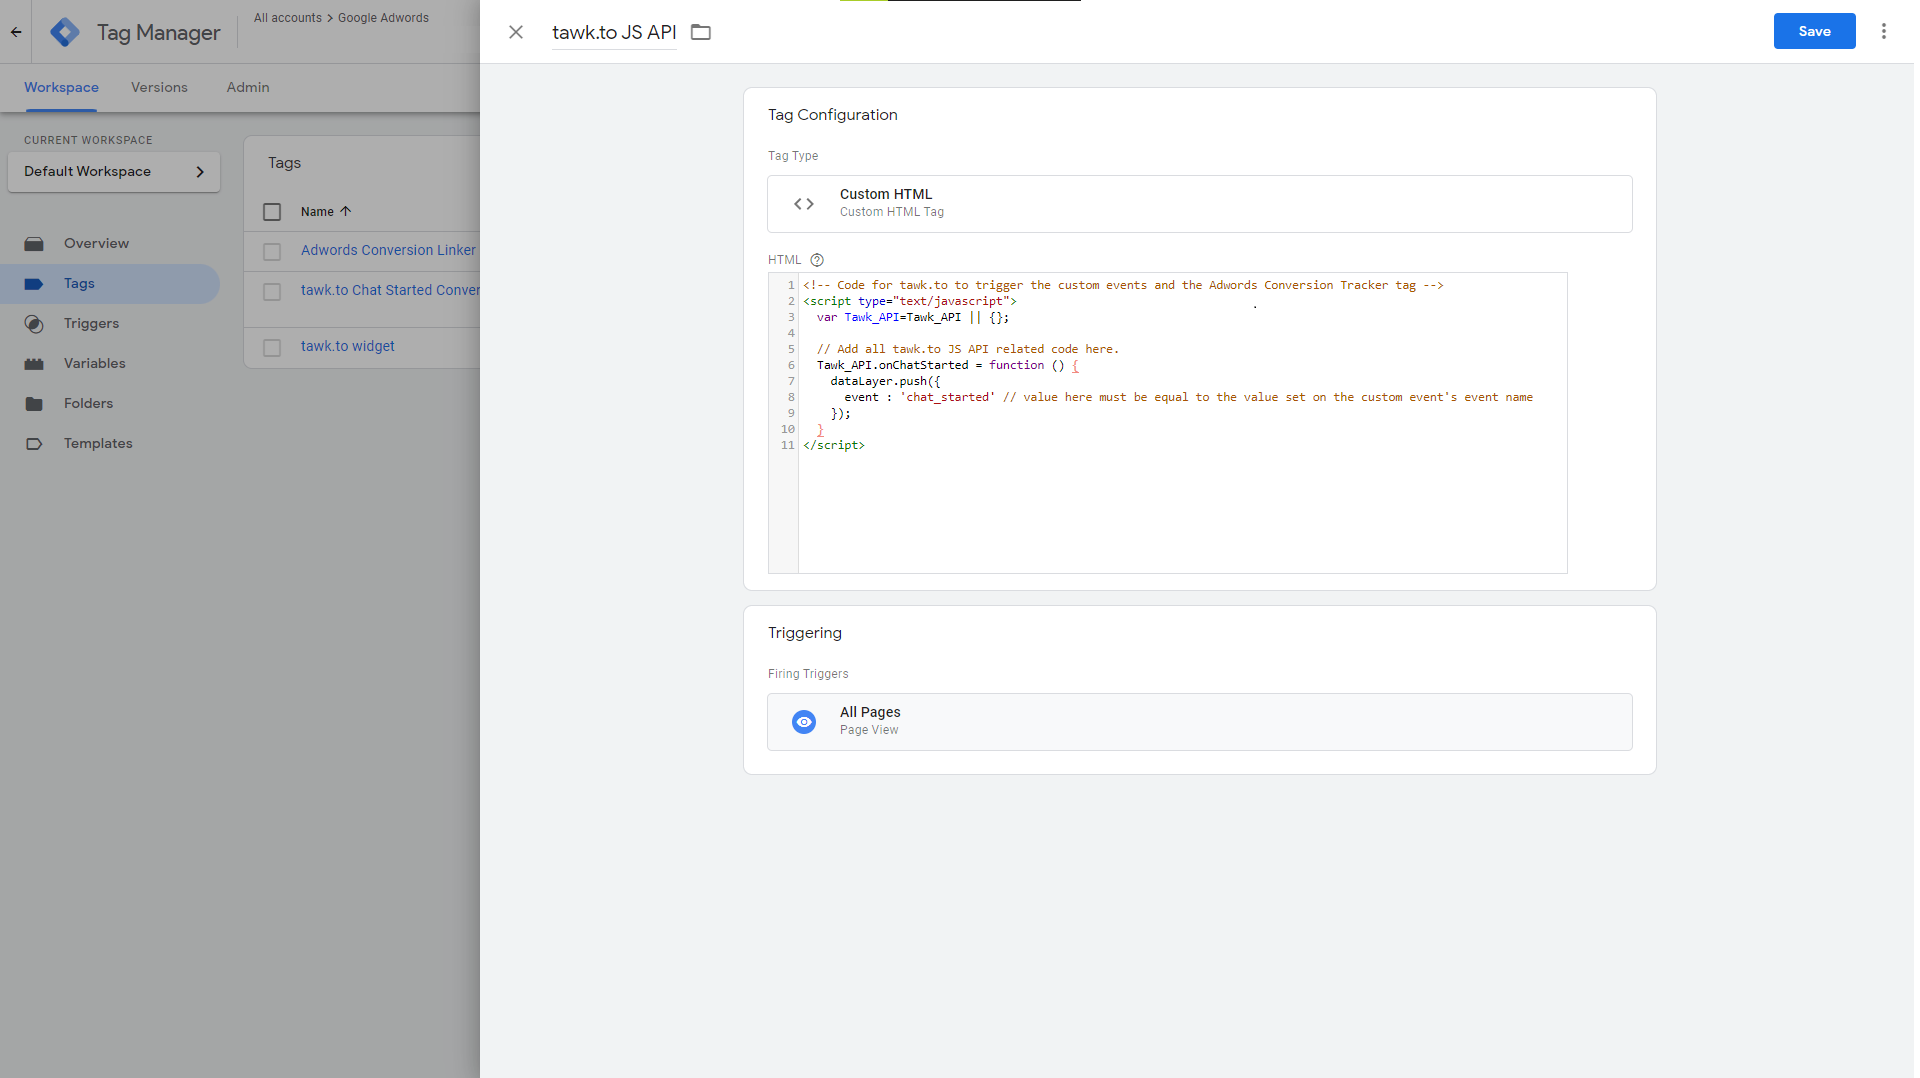
- Create a new tag and select Custom HTML as the tag type.
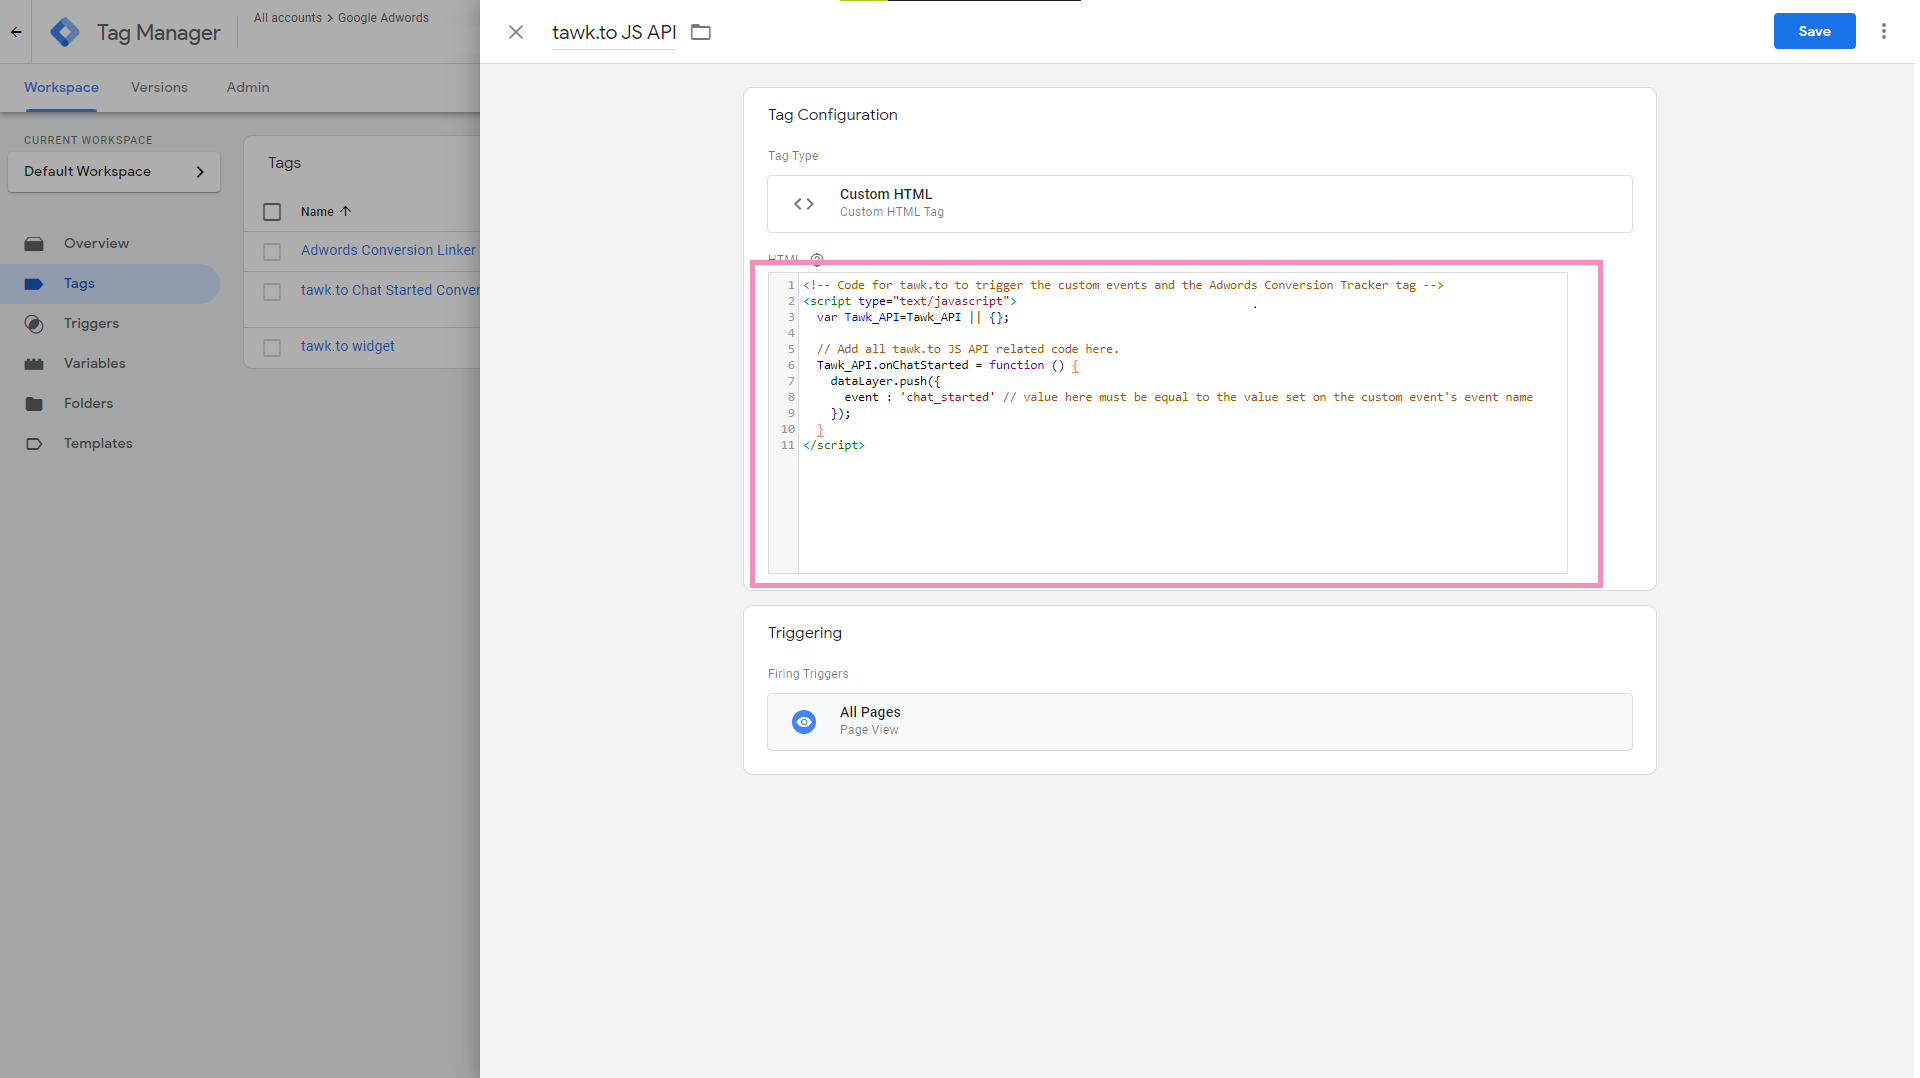
- In the HTML field, enter the following code block. The event property’s value should be equal to the Event Name you entered when creating the custom event tag.
<!-- Code for tawk.to to trigger the custom events and the Adwords Conversion Tracker tag -->
<script type="text/javascript">
  var Tawk_API=Tawk_API || {};

  // Add all tawk.to JS API related code here.
  Tawk_API.onChatStarted = function () {
    dataLayer.push({
      event : 'chat_started' // value here must be equal to the value set on the custom event's event name
    });
  }
</script>
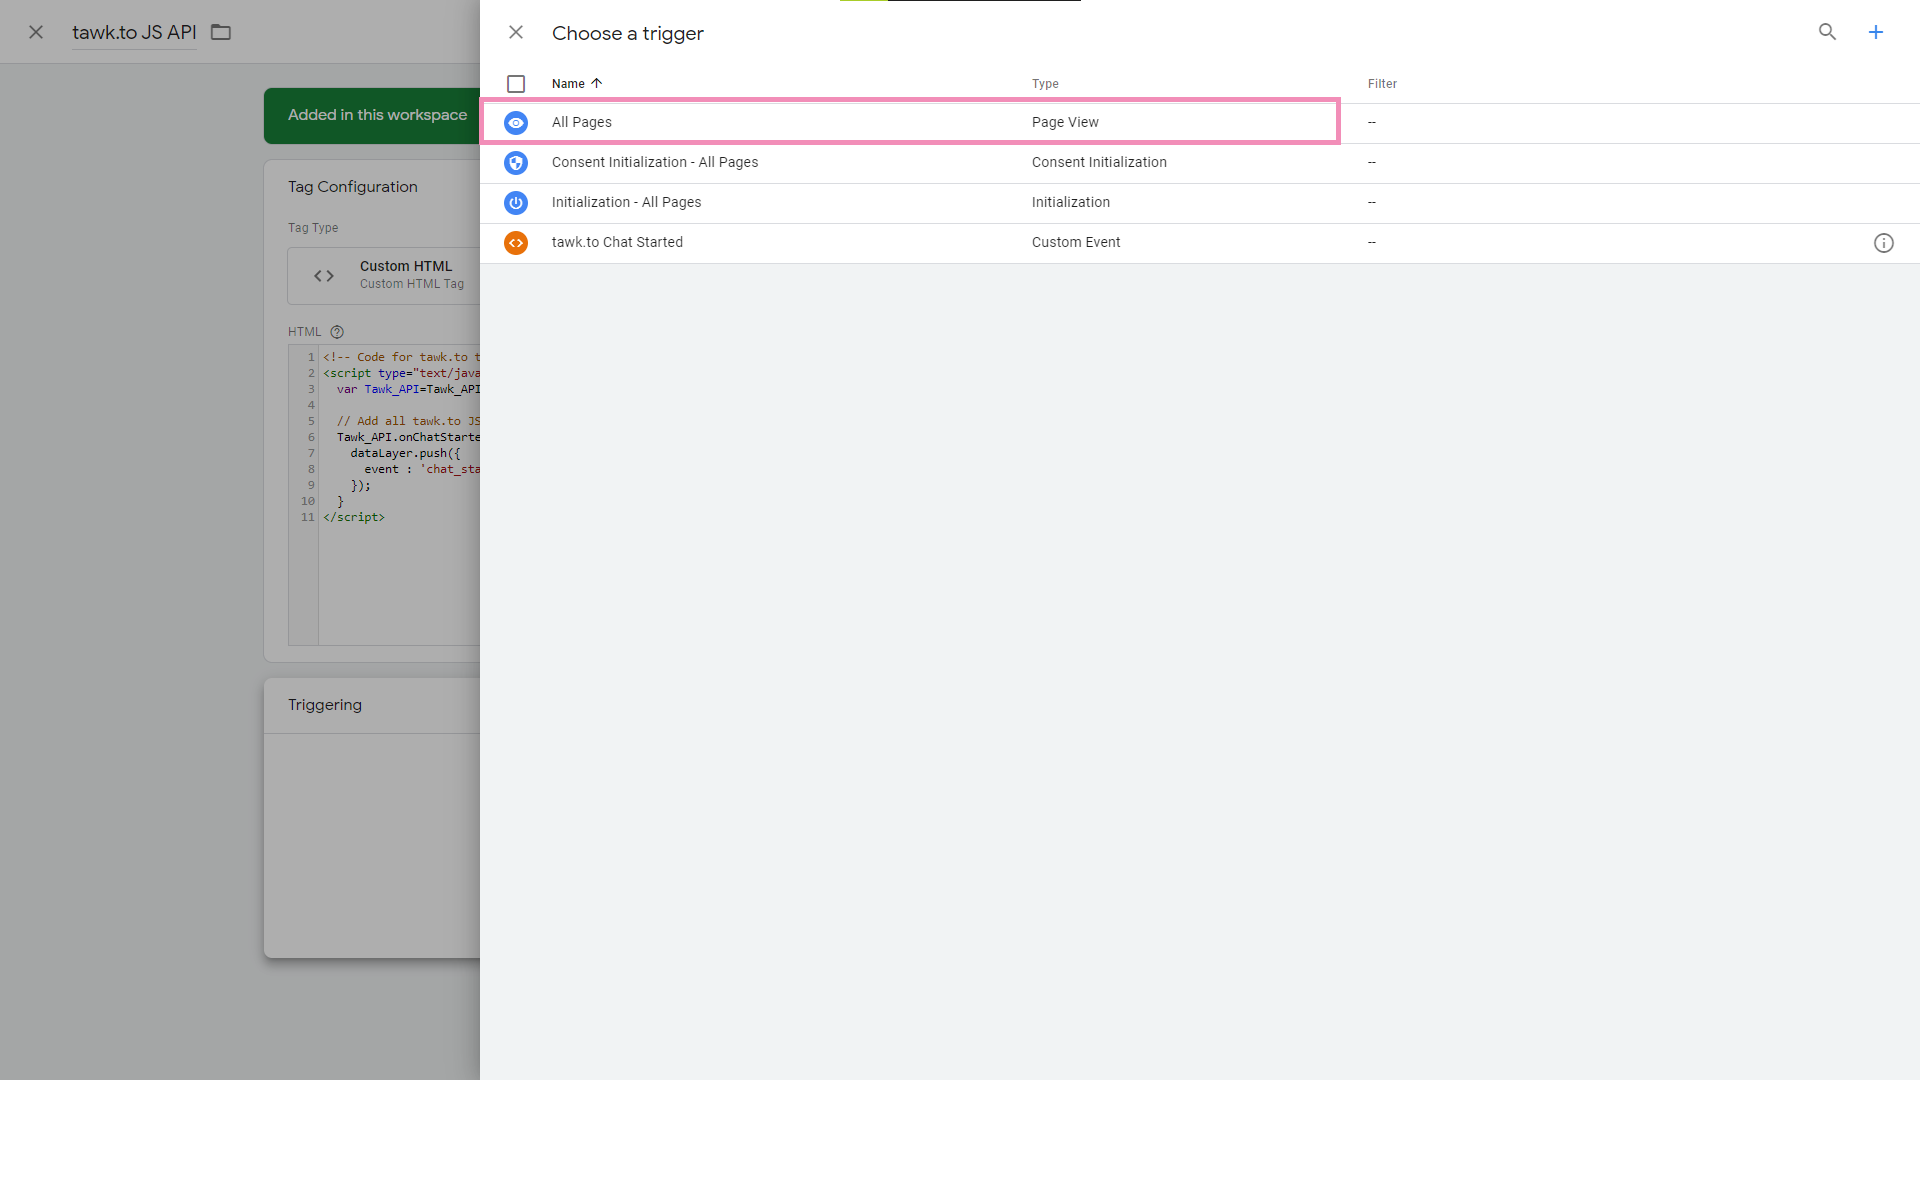
- In Triggering, select All Pages to allow the tag to fire on every page on which Google Tag Manager is installed.
- Click Save to complete the tag creation.
Check to see if the Google Ads Conversion Tracking tag has been triggered
-
In your tag manager dashboard, click Preview. A new window will open allowing you to connect Google Tag Manager to your site.
-
Enter your website URL. The URL you enter will open in a new window.
-
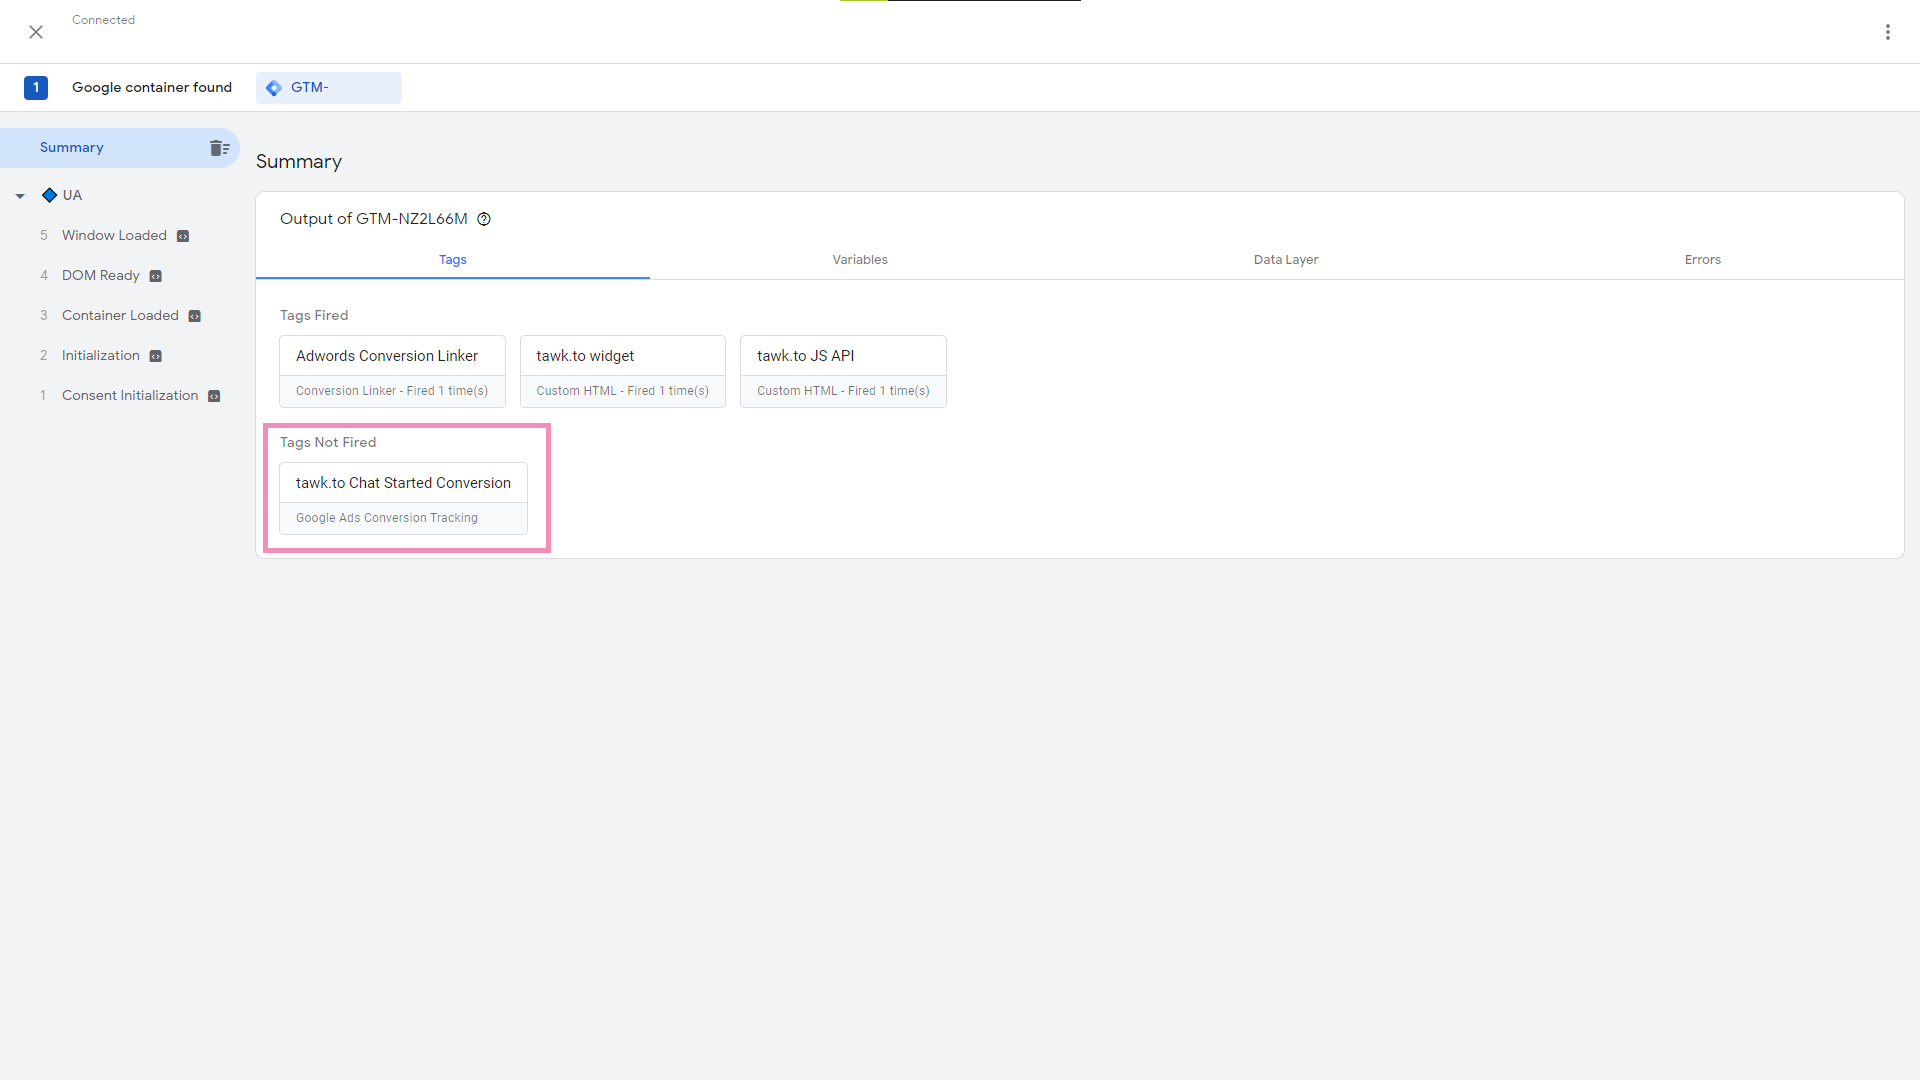
Go back to the tab/window where you opened the Preview page. You should be able to see your Google Ads Conversion Tracking tag hasn’t been fired yet.
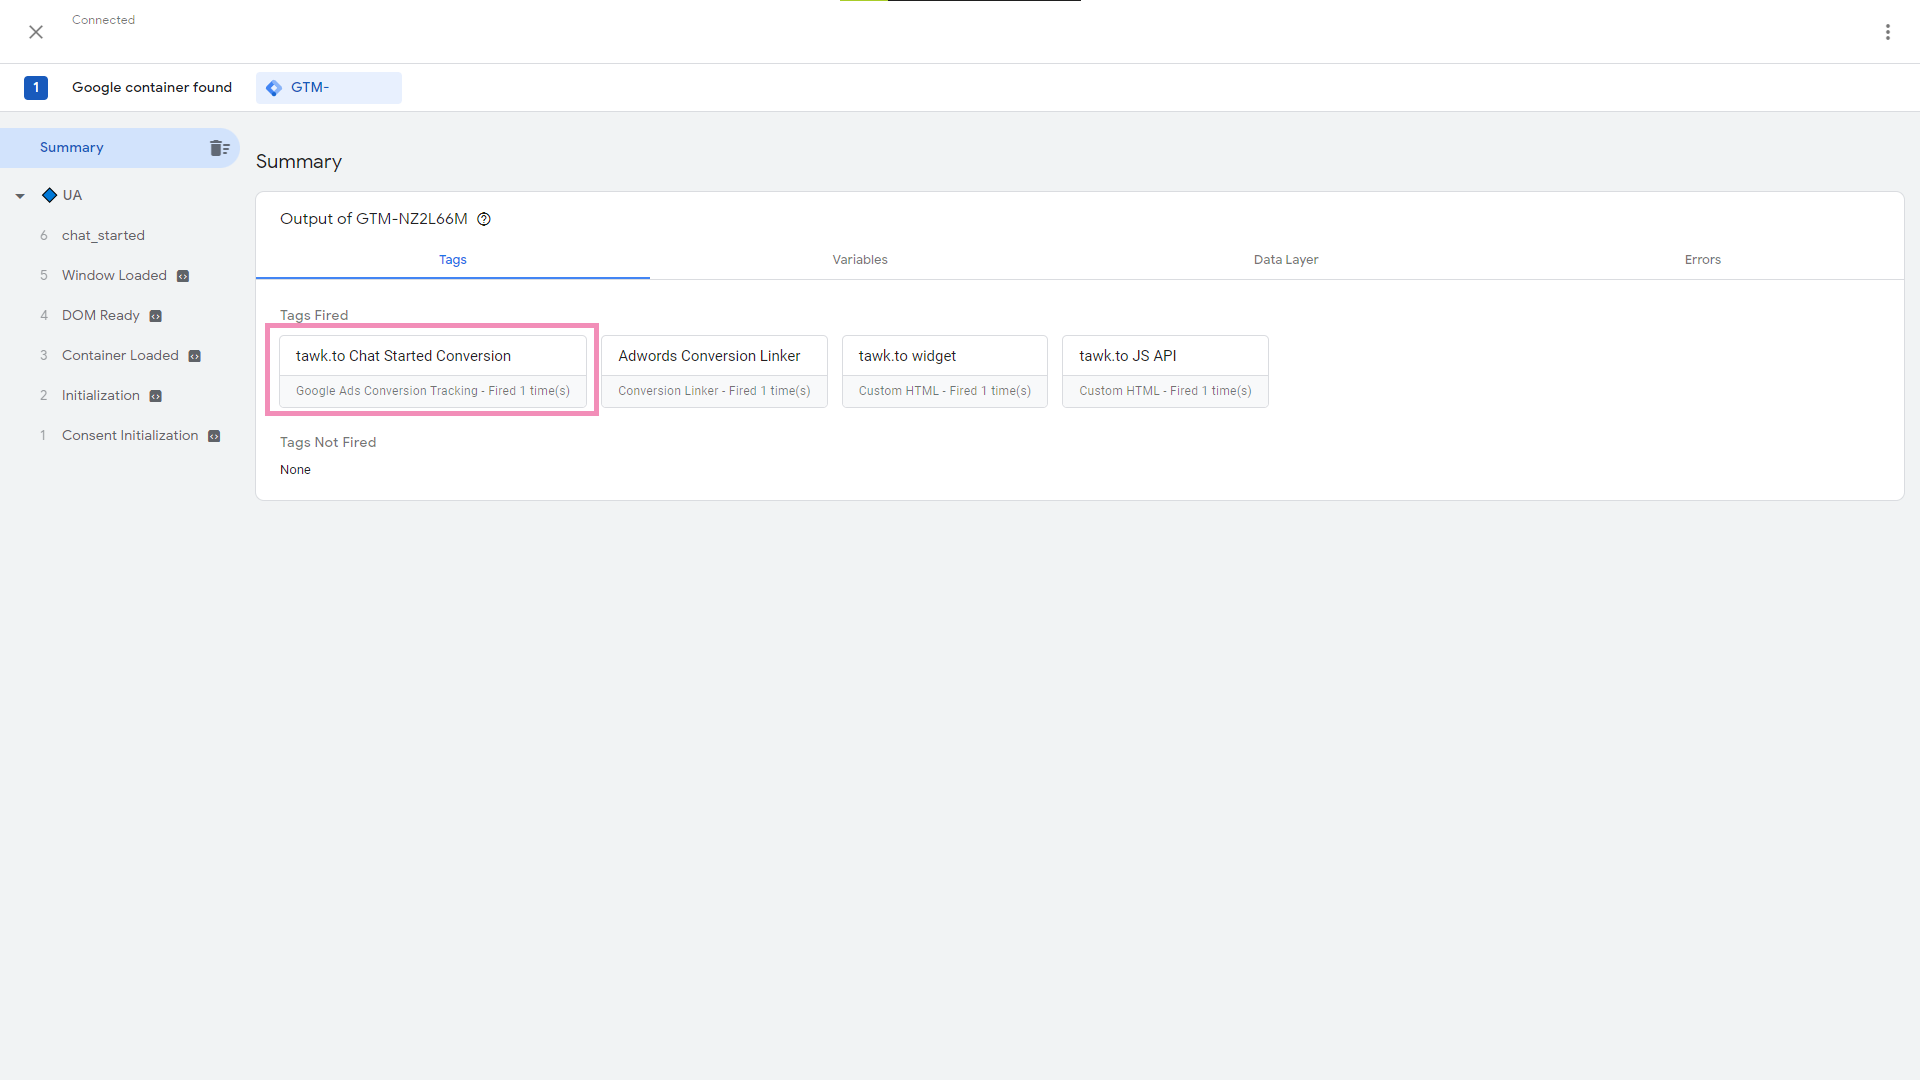
- To fire the tag, we’ll trigger it using the custom event we created earlier (which, in this example, is triggered when a chat is started).
Once we’ve triggered our OnChatStarted JS API, that should send an event to the Data Layer which now triggers the Google Ads Conversion Tracking tag.
Related Post

Create Faceb...
May 30, 2024 21:33:00

GA4 Enhanced...
Apr 25, 2024 20:33:00

Google Ads C...
Nov 20, 2023 23:35:09

Integrating ...
Nov 19, 2023 23:35:09

BDIX CONNECT...
Nov 18, 2023 11:35:09
